Stock Level Operations
 This page contains general information about how to receive stock and deliveries into your system. Many customers often
have more customised and specialised processes, and details of how that process is to be used may invalidate some of the information below.
This page contains general information about how to receive stock and deliveries into your system. Many customers often
have more customised and specialised processes, and details of how that process is to be used may invalidate some of the information below.
Jump To:
Creating a Purchase Order |
Receiving a Purchase Order |
Receiving an Unexpected Delivery |
Entering Document Details
Receiving a Store Transfer
Stocktakes

Scanned Document
How to scan an invoice and receive stock using the scanned image directly
Entering Document Details
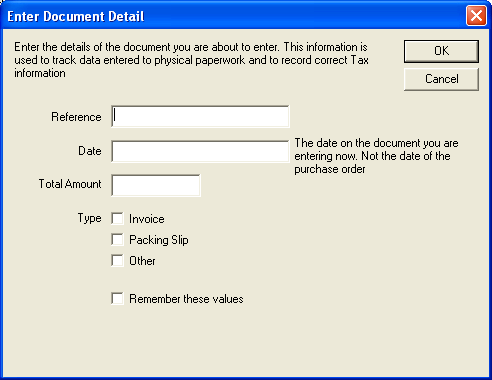
The first step in receiving stock into the system for both purchase order deliveries and unexpected deliveries
is to enter some overview information about the document you are keying. The screen that will appear is
shown to the right.
Depending on your system configuration, some or all of these fields are required.
Reference This is the primary unique identifier on the document, such as invoice# or packing slip#.
Generally these numbers are unique from each supplier, but this is not a requirement. If you enter a reference
number/value that has already been used for this supplier, the system may block or warn you depending on setup.
Date The date on the document. This is not the date you are entering information, but the date on the document. This
field is required as the exact date of a document can impact cost and tax calculatons.
Total Amount The absolute total of everything on the invoice, including all taxes. This is the amount you will eventually have to pay. This
amount may be required on some configurations as the capture process coming next attempts to ensure all the individual lines total to this figure.
Type What type of document are you entering.
Remember these values Sometimes, some stores will capture a large invoice in several attempts, which can be a good idea if it will take hours
to enter. By ticking this box, the values entered above are temporarily stored and will be loaded as the defaults for this screen next time.
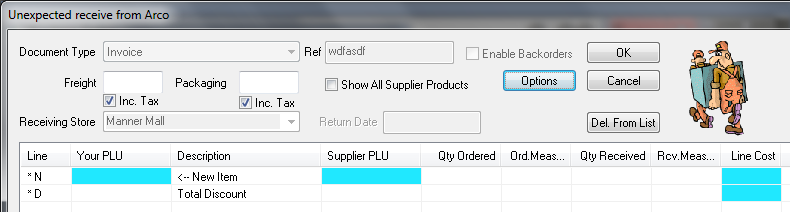
Receiving an Unexpected Delivery
Once you have completed the document detail screen (above) the main entry screen will appear. Before you enter items, you MUST enter the amounts
for freight and packaging if these are listed as seperate line items. This information is required before entering products as these charges will generally
be spread across the items you are receiving and once this starts, the freight/packaging amounts cannot be changed.
Freight and packaging can be listed on invoices either "inclusive tax" or "exclusive tax", both are in common use and you will need to indicate to the system
whether the amount(s) you enter are including tax or not. There is a small tick box under the freight and packaging fields to indicate tax included.
Freight Example #1
| Ext Total | 89.04 |
| Freight | 7.25 |
| Sub Total | 96.29 |
| GST | 14.45 |
| Invoice Total | 110.74 |
In this example, the "freight" figure would be entered as "7.25"
and the "Inc Tax" unchecked. This is because the freight amount has GST applied onto it
Freight Example #2
| Total | 725.50 |
| GST | 108.83 |
| Freight | 57.00 |
| Total | 891.33 |
In this example, the "freight" figure would be entered as "57.00"
and the "Inc Tax" would be checked. This is because in this example freight
is already including GST
When you are ready to enter the items, you can scan the barcodes or manually select items.
To manually enter items, click into the blue "PLU" field and press the "insert" key. A product finder will be displayed.
Alternatively, you can hold down the ctrl-key while pressing "insert" and a search by supplier PLU screen will be shown instead.
Click for Technical Information on this screen
Creating a Store Transfer
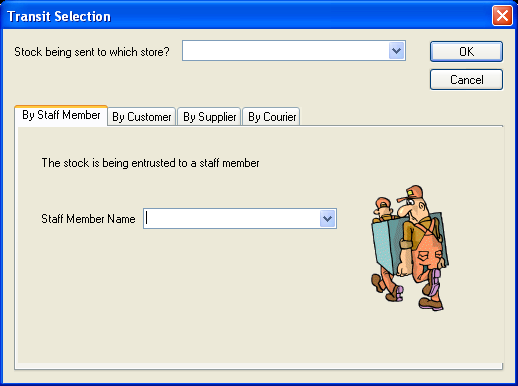 The Transit Setection screen is used during the creation of a transit request and selects details about where and how
the stock will be transported.
The Transit Setection screen is used during the creation of a transit request and selects details about where and how
the stock will be transported.
- Implemented in CCpurchasing.dll DlgScreenTransitSelector. Accepts barcode scans.
- This screen makes no direct changes to the database, it builds and returns a POS Command for processing with the
details selected by the user
- The store selector will only load stores that are capable of receiving stock.
- The tables transit_inventory and transit_inventory_lines are required in the database in order to create transit orders
By Staff Member Tab
- If setting PurchTransitAllowStaff=0 then this tab is disabled, but not hidden.
- All active staff members are available to be selected
By Customer Tab
- If setting PurchTransitAllowCustomer=0 then this tab is disabled, but not hidden.
- All customers are available to be selected
By Supplier Tab
- If setting PurchTransitAllowSupplier=0 then this tab is disabled, but not hidden.
- All suppliers are available to be selected
By Courier Tab
- If setting PurchTransitAllowCourier=0 then this tab is disabled, but not hidden.
- Couriers are primarily loaded from the database table carriers.
Receiving a Store Transfer
A store to store transfer is a collection of products shipped from one store to another. When sending store
creates a transfer order a reference number is produced and you must enter this number in order to receive the transfer.
- The delivery label and packing slips may have a barcode printed on them. You can scan this barcode to instantly load the transfer.
- Alternatively, the transfer packing slip will have a two part reference number, such as "522-2", you can manually enter this reference number.
There is no search facility generally available at store level, but reports are available in head office showing outstanding transfers.
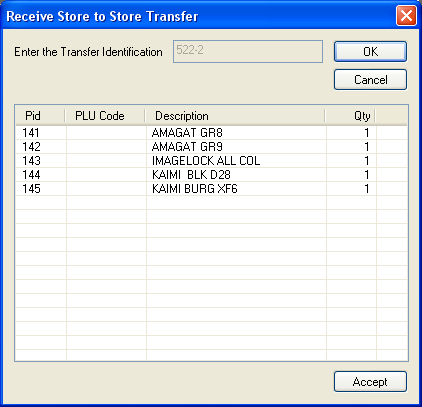
Once you identify the transit order, the pos will display the items and qty's that were entered against this store transfer at the sending store. In this example the Transfer ID# was 522-2. It must be entered exactly as printed. (See screen shot).
Confirm that the items listed match that the actual items and qty's sent. If everything is correct, then click "Accept" to receipt the stock in. If the items and qty's listed do not match the actual items and qty's sent, then do not complete receipt in of stock. Click Cancel and either contact the courier, the sending store or your supervisor regarding the missing or incorrect stock. By clicking "Accept" to receipt the stock you are confirming that the order is correct.
Once complete, the stock levels for the items will be adjusted to reflect the qty's received. (This may not appear to change immediately).
NOTES:
As a store transfer involves two stores and trust that stock is moving correctly, there is a lack of freedom in receiving goods so the system is intentionally
inflexible in order to reduce fraud potential.
- You cannot edit the qty's to be received. If stock is missing do not complete the order and contact the courier, supervisor or sending store as to reasons why.
- If you absolutely must receive the order and stock is missing, you will need to enter a shrinkage adjustment elsewhere in the system, after receiving the order, which will also capture the reason
why this happened.
- You cannot add additional lines to the items being received.
- If the sending store forgot to list all items, they will need to create another transfer with just the missing items, and you can accept both transfers.
- You cannot receipt stock in that is destined for another store.
- Once an order is receipted in and accepted by the user, it cannot be reversed or deleted from the system.
- Incorrectly accepted transfers may cause stocklevels to be incorrect within the system.
Store Transfer Error Codes
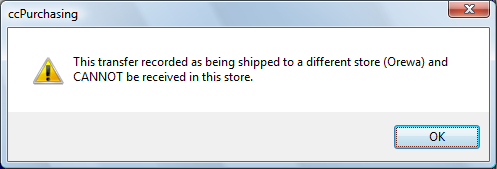
Attempting to receive stock destined for another location:
Displayed to user if an attempt is made to receipt in a store transfer destined for another location. The correct target location will be displayed
in the message.
The store transfer can only be receipted in at the target store. Transfer is still open and incomeplete.
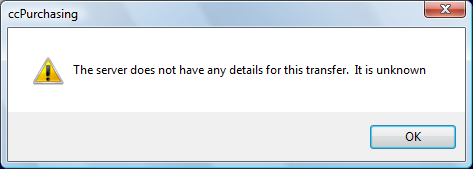
Unknown transfer details:
Displayed to user if the transfer number to be receipted in is unknown to your server.
The transfer record may not have reached your server at this time.
Transfer is already complete:
Displayed to user if the transfer number to be receipted has already been recorded as complete.
The transfer record is marked on your server as having been aleady receipted in.
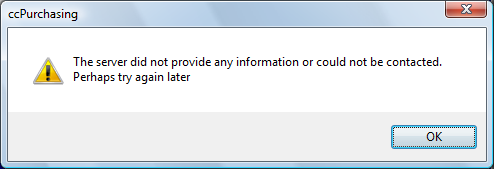
Transit Server is Unreachable:
Displayed to user if your server is unreachable at this point in time.
After entering the transfer id number the pos attempts to connect to your server
to retrieve the transfer information.
If a connection to your server cannot be established then the transfer cannot be receipted in until this connection can be established.
Store Transfer Resend
The following support quickcode F2166 will allow the complete transfer id number to be entered and transferred again from the location the stock is being sent from.
To issue this quickocde your machine requires internet connectivity to http://www.fieldpine.com. You cannot issue this quickcode from your server or your target store.
You must be running at least P1918 to use this quickcode. Caution is advised if you plan to use this quickcode.
Technical Notes
Transits are centrally stored in the Head Office database, a receiving store will need to connect to the central server to accept transits. The following is required to be setup for this to function correctly.
Do not add the field ssccserial to the transit_inventory table in distributed lanes. This field is an internal trigger. If this field is required/defined in the database but you wish to search the central database, define TransitReceiveLocal=0. This setting causes the receive component of transit to always request from the central server.
The setting BISTransitServer must be defined to point to the central head office system.
Feature Currently in testing
Supplier?Learn how to create easy to use Invoices...more
Receiving stock by using a scanned image allows you to skip directly from scanned document to received goods in the system.
- Receive stock from courier or delivery truck, verify invoice matches delivery.
- Scan the invoice.
- The system "reads" the invoice and tries to understand it.
- At your leisure, review scanned documents to ensure accuracy.
- Done.
Select or Upload Scanned Document
To begin, select the scanned document you wish to confirm into the system
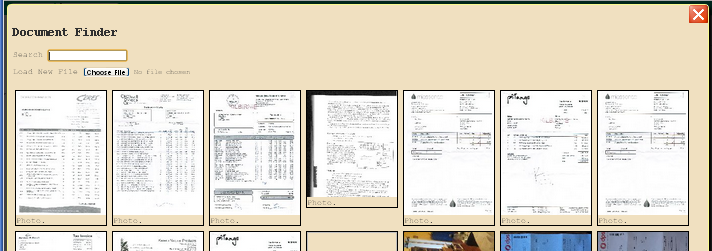
The selection screen shows a range of recently uploaded documents, or you can upload a file directly via your browser now
Tip. Preloading scans for later processing is much quicker, this allows the system time to process the scanned document and performs a
stronger analysis than when you load a scan to confirm immediately
Review and Accept Scanned Documents
The main confirmation screens shows the invoice as was scanned. Key information is displayed at the top, items in the middle and
totals at the bottom. This general layout is used regardless of the layout of the scanned document.

The lines are colour coded to aid entry.
- Yellow fields are those that we expect you to enter values or double check. This is the key information such as quantity
and price
- Blue fields are those that the system will complete for you, but you can change if you wish. Information such as freight and packaging
allocation to individual products is blue; the system will allocate for you, but you can allocate freight manually if you wish
- Green lines are lines that are complete and we believe are ready to be confirmed.
- Red cells are used when we know that a figure is wrong, usually because it does not add up.
Your aim in confirming an invoice is to get each line with a green bar, the overall progress indicator at the top right on 100%
The system will automatically try and match the suppliers descriptions to your product list. As supplier
descriptions are not usually the same as your descriptions, the system will use several pieces of information from the line to help. Supplier part codes,
supplier descriptions, RRP, cost, barcode or anything else that might help.
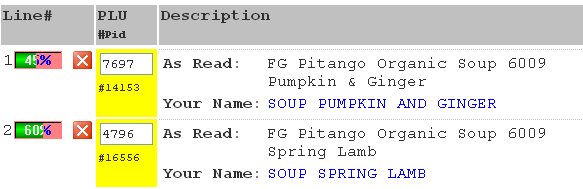
The linking process has an idea of how accurate the link suggestion is, and this is displayed to the extreme left of each line. In the example shown
we have matched the first line with a 45% estimate and the second line with a 60% estimate. These are the systems best guess, but you should
confirm them
Over time, as you accept suggestions or manually set the linked product, the system learns what you have linked where and trusts the links more, so
the percentages will increase.
Scanning an Invoice
Technical Recommendations
- Aim for around 300dpi to 600dpi scanners. When buying a scanner ignore the "interpolated resolution" figure
as this is not helpful for documents, you should verify the "optical resolution" of the scanner. Many printers
already have scanners that meet these criteria.
- If you are buying a dedicated scanner, we recommend one with automatic document feed or flat bed. Hand held devices
that you wave over the document are much harder for the system to read due to slight variation in the speed you move over the
document
- You can use cameras if you wish, but we recommend a fixed scanner for serious use.
- You need cameras of around 5 MegaPixels. (optical, not interpolated)
- Test the camera before purchase. Some devices set the compression
ratio very high resulting in images that are not reliable for our purposes.
- iPad cameras are currently not of sufficient resolution to be used reliably.
- Lighting is very important. Try and photograph documents in sunlight, avoid
shadows and brigth spots on the document.
Understanding the System Reading Process
The system uses an OCR engine (optical character recognition) to read the document contained
in the picture. Humans are very good at reading documents and instantly understanding them, computers
struggle with some aspects that humans find easy.
The output of the OCR engine is a file containing the text as read. This is rarely 100% accurate
and contains small imperfections, such as "7OO" instead of "7.00". The Fieldpine system uses
a number of methods to try and both correct these imperfections and to link the contents of this
document to your retail system
As you use the system it learns from your actions and what you say we correctly understood or not.
This also means that the system needs to have seen an invoices similar to ones you are trying to read.
There is infinite variation in how invoices are printed, with often subtle differences that can
be tricky for computers. If you have documents that are not understood well by the system and are a high
quality image, you can submit these to the developers as test examples.
We currently only understand documents in English
With the bulk writeoff feature you can create a spreadsheet containing a list of products, stores and quantities to writeoff.
This spreadsheet can be uploaded and the system will bulk process the records. You are still able to enter write offs individually
into the system if you prefer. Bulk Writeoff is designed for power users rather than occasional use
Step 1 - Create Spreadsheet
| |
A |
B |
C |
D |
E |
| 1 |
Pid |
Location |
Quantity |
f110 |
|
| 2 |
12783 |
10 |
3 |
|
|
| 3 |
1313 |
10 |
32 |
|
|
| 4 |
7011 |
10 |
1 |
|
|
| 5 |
783 |
13 |
302 |
|
|
The spreadsheet must have the columns Pid, Location and Quantity.
You can optionally include a reason for the writeoff by placing a value in the column f110. The following is a selection of common
reason codes but your environment will include others you can use
| Code | Description |
| 1 | Shop Soiled |
| 2 | Damaged |
| 3 | Stolen |
| 4 | Lost |
| 5 | Shop Use |
Step 2 - Upload Spreadsheet
TBS
Supplier Pricebooks can be directly loaded in Fieldpine Retail if they are in a format that can be understood. This allows
you to simply upload the whole book rather than keying in partcodes individually.
| |
A |
B |
C |
D |
E |
F |
| 1 |
Code |
Description |
Quantity |
Unit Cost |
Case Cost |
Barcode |
| 2 |
12783 |
Apple Rings |
12 |
1.00 |
11.50 |
9412345525 |
| 3 |
1313 |
Peach Leaves |
24 |
|
18.90 |
9412348834 |
| 4 |
7011 |
Orange Pips bulk |
1kg |
44.90 |
|
|
Acceptable pricebook formats are:
- Excel spreadsheets saved as XLSX format
- CSV Files
- XML using a simple stateless protocol
Pricebooks can also be uploaded if they are Word Documents, PDF documents or high quality scans/photograpahs. Although all of these
formats have restrictions and are not as reliable as XLSX spreadsheets
The document you upload should include the columns code (suppliers part code), description, unit cost and barcode. The barcode field
is used to match supplier part codes to your products.