Barcode Scanners Customer Displays Public Product List Scales
Email Accounts Websites
Pre Install Planning Creating a Franchise
Installing Fieldpine PosGreen
These instructions are for retailers that already have Fieldpine installed and wish to add additional lanes or checkouts.
A comprehensive technical description of the install process is at /docs/internals/PosGreenInstall.htm
Step 1 - Download installer
On the computer you wish to install PosGreen browse to https://fieldpine.com/kits/posgreen.exe
If this URL does not work, then check your internet connection, antivirus or anything else that might interfere with browsing the internet. You may need to change your Anti malware to allow this program if the settings are set to extreme security.
Step 2 - Answer all the security warnings
You may receive several warnings and additional prompts when downloading this program.
 . For example, the browser itself may display this sort of prompt
You will need to navigate these prompts and say that you trust this file. The type and wording of the warning varies depending on which browser you are running
. For example, the browser itself may display this sort of prompt
You will need to navigate these prompts and say that you trust this file. The type and wording of the warning varies depending on which browser you are running
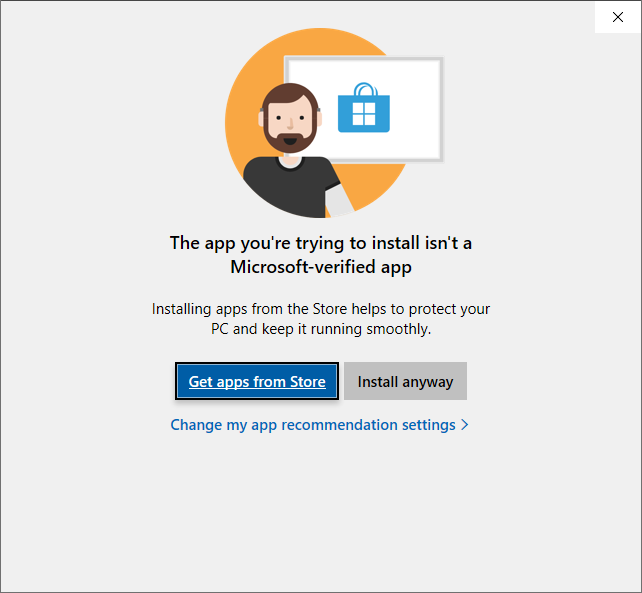
You will then probably be presented with this screen from Windows saying the program didn't come from Microsofts App Store. Click "Install Anyway"
You may also be presented with more warnings from your anti virus tools.
Step 3 - Fieldpine Install Main
When the PosGreen installer program runs, you will be presented with a screen similar to the following. There are several options for installing depending on your current environment.
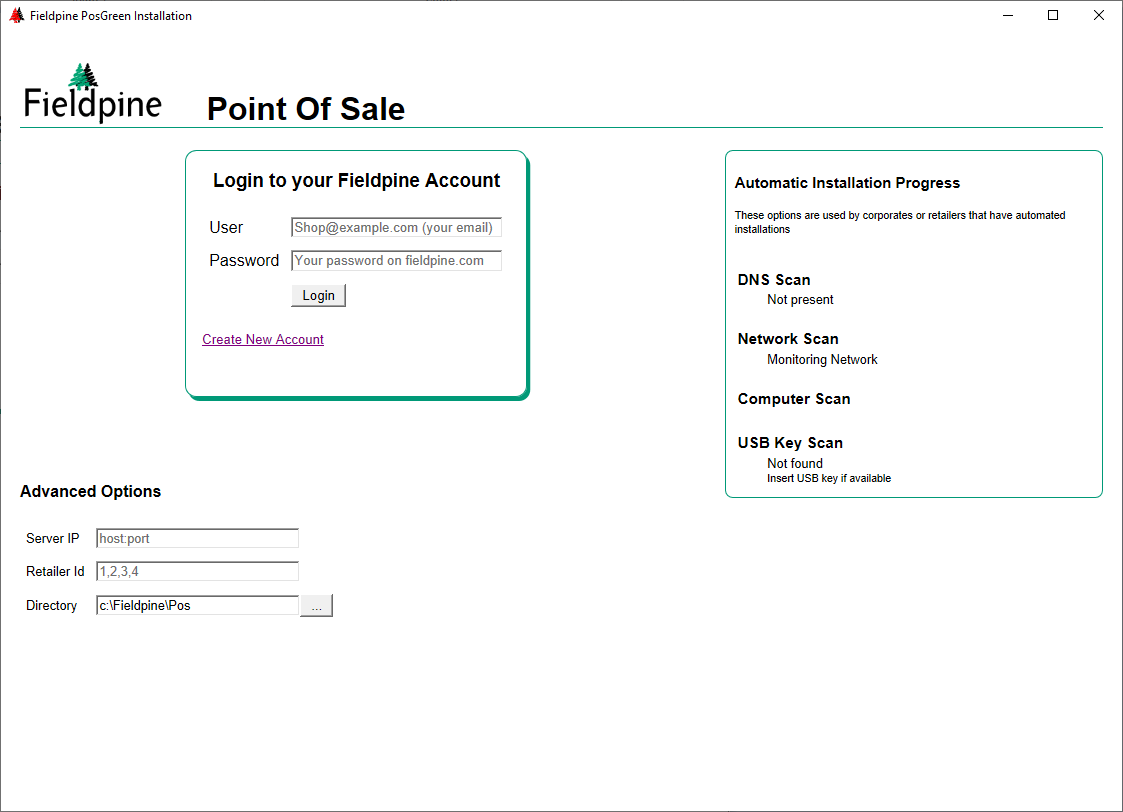
Step 4 - Select Installation Technique
At this point various paths exist depending on your exact configuration. Select which case best describes you.
| If you are installing a lane that will connect to Fieldpine Online, skip to Step 5 |
|
|||||
| If your DNS Scan has shown an option skip to Step 6 If you are a corporate retailer with your own IT department, this option will typically appear |
|
|||||
| If you are running your own Store Server, skip to Step 7 |
|
|||||
| If you are running your own Head Office Server, skip to Step 8 |
|
Step 5 - Fieldpine Online
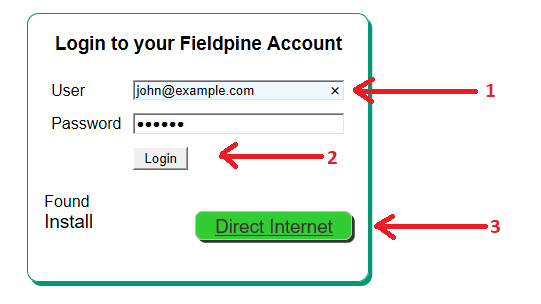 If your Pos system is to use Fieldpine Online as the primary database, then enter your Fieldpine login details and click login.
If enabled, a button will appear that you can select to install.
If no installation options appear, then your Fieldpine Online account may have disabled direct access. Using a web browser, login to your Fieldpine Account as normal, select "Stores" and then "configuration" to enable it.
Step 6 - Existing corporate environment (with DNS)
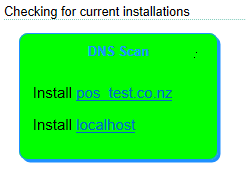 If you are installing into a corporate environment within a private network, then the "DNS Scan" may be green, with a link
to install automatically. Select the retail system you wish to use and the installation process will automatically continue.
If you are installing into a corporate environment within a private network, then the "DNS Scan" may be green, with a link
to install automatically. Select the retail system you wish to use and the installation process will automatically continue.
In the example shown, there are two retail systems present
Note to IT Departments. Your corporate network is detected by having a DNS SRV entry _fieldpinepos._tcp.current.local.domain with the details of your primary server IP and port
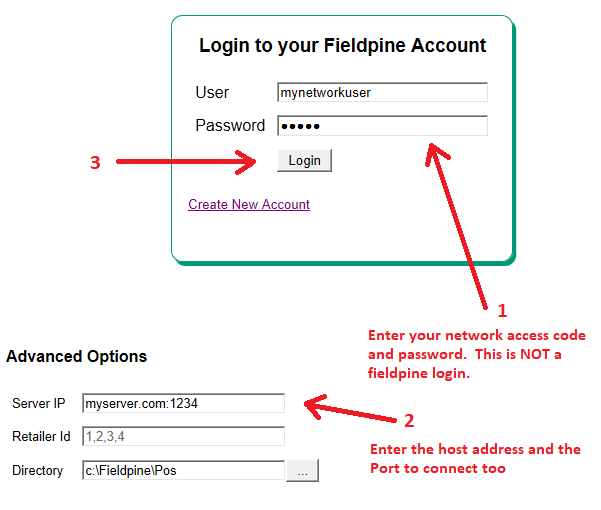
Step 7 - Existing retail environment (without DNS)
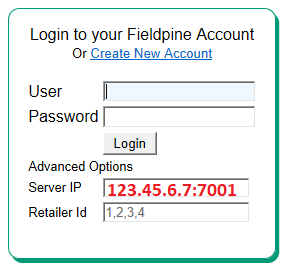 If you know the IP address of your server, you can directly enter this address where the example illustration shows in red, and click "Login". The installer will connect to that
server and request available configurations.
If you know the IP address of your server, you can directly enter this address where the example illustration shows in red, and click "Login". The installer will connect to that
server and request available configurations.
Step 8 - Installing to an Internet Accessible Retail Server
 Enter the details of your server as shown. The installer will connect to this address and obtain installation instructions.